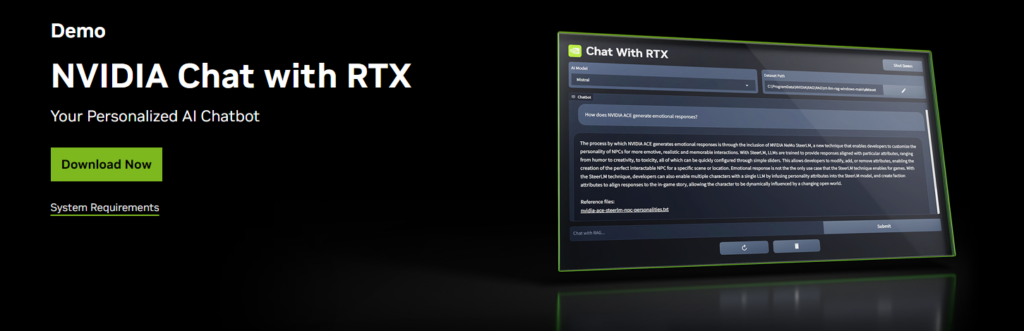
In the realm of AI innovation, Nvidia introduces Chat with RTX, an ingenious solution poised to revolutionize offline engagement with intelligent chatbots. This comprehensive guide serves as your gateway to unleashing the full capabilities of Chat with RTX, empowering you to seamlessly integrate, configure, and harness the power of AI models for enriched dialogues. Let’s delve into the intricacies of utilizing Chat with RTX to its utmost potential.
Table of Contents
How to download Chat with RTX by Nvidia on PC?
Downloading Chat with RTX
Eager to embark on your journey with Chat with RTX? The initial step requires you to download the installer from Nvidia’s official website. Brace yourself for a sizable download, approximately 35GB in size, make sure you have a stable internet connection and patience.
Storage requirements:

Allocate a storage directory with a minimum of 100GB of available space to accommodate Chat with RTX and its associated data during installation.
Extraction and installation:
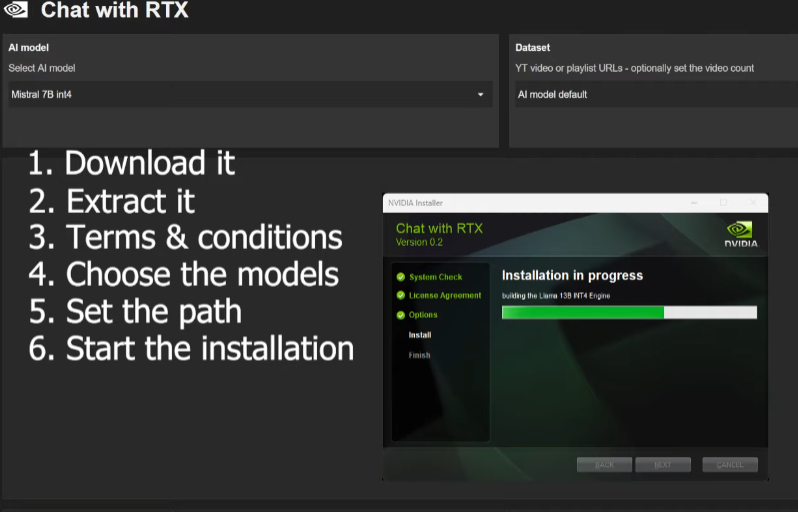
Once the download concludes, execute the extraction process by right-clicking on the downloaded folder and opting for “Extract all.” Subsequently, delve into the extracted folder and initiate the installation by running the setup.exe file, meticulously adhering to on-screen prompts.
Exercise patience as the installation happens, it may take up to 45 minutes even on powerful PCs. Temporary system slowdowns may occur, particularly during the configuration phase of AI models.
Upon successful installation, a desktop shortcut for Chat with RTX appears, simply double click to run Chat with RTX on your PC, it will open in a browser window.
Troubleshooting on Chat with RTX:
Encountered an installation snag? Fret not. Simply rerun the installer and designate the same storage location. The installation process seamlessly resumes from the point of interruption.
How to use Chat with RTX on PC?
Data Organization
The foundation for a smooth integration lies in organizing your data into a dedicated folder. This ensures efficient access and compatibility with Chat with RTX. Here are some key points to remember:
- Create a dedicated folder: Establish a specific directory on your system to house the data you intend to integrate. This promotes organization and simplifies the selection process within Chat with RTX.
- Ensure compatibility: Verify that your data files adhere to formats supported by Chat with RTX. Common compatible formats include plain text (.txt), portable document format (.pdf), and Microsoft Word documents (.doc). If necessary, convert your files to one of these formats before proceeding.
Accessing the Data Repository
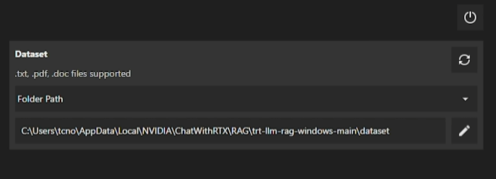
Once your data is organized, it’s time to connect it with Chat with RTX. Here’s how to achieve this:
- Launch Chat with RTX: Open the Chat with RTX application on your device.
- Locate the “Dataset” section: Look for a designated area within the interface labeled “Dataset” or similar. This section typically features an icon resembling a pen or folder, acting as a visual cue.
- Designate your data folder: Upon identifying the “Dataset” section, navigate to your file system and select the folder containing your organized data. This establishes the link between your data and the Chat with RTX platform.
Recognizing New Data
Chat with RTX thrives on the most up-to-date information. To ensure the platform incorporates your newly added data set, follow these steps:
- Initiate a model refresh: Within the Chat with RTX interface, locate the option to refresh the AI model. This process allows the platform to recognize and integrate your recently added data set.
- Maintain consistent refreshes: Remember to repeat the model refresh process whenever you introduce new data or switch between different data sets. This guarantees that Chat with RTX consistently operates on the most current information you provide.
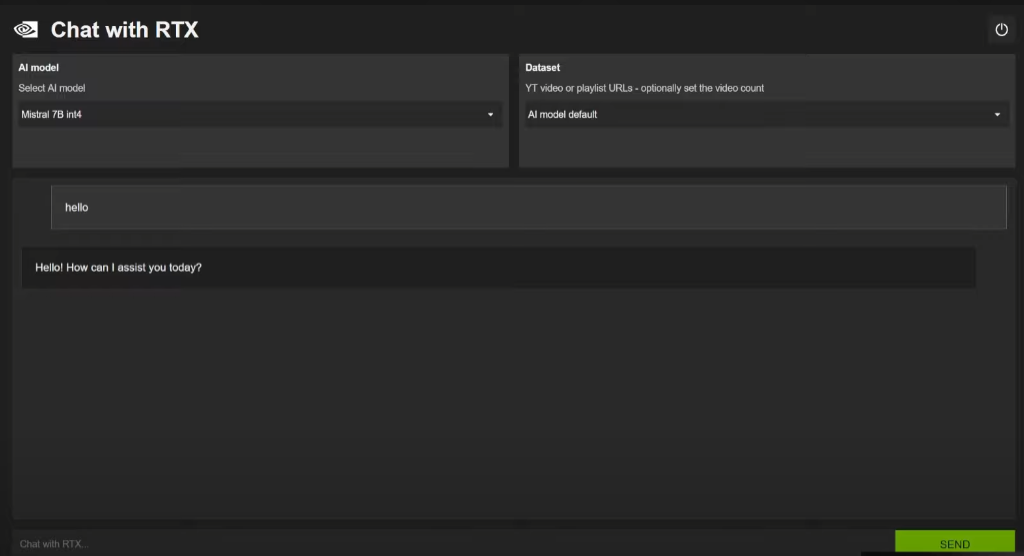
AI Model Selection
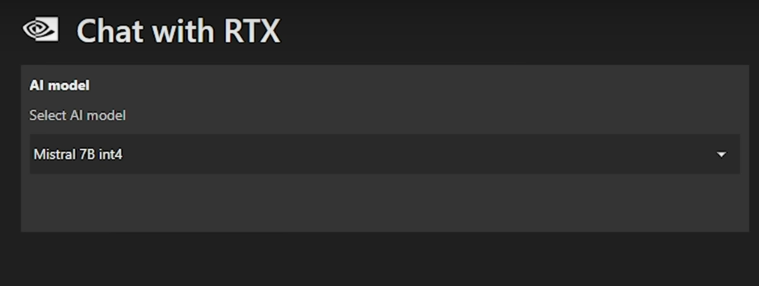
Chat with RTX offers a diverse selection of AI models, each with its own strengths and specializations. To optimize your experience, consider the following:
- Explore the available models: Familiarize yourself with the various AI models offered by Chat with RTX. Each model may possess unique capabilities and areas of expertise.
- Select the most suitable model: Choose the AI model that best aligns with the type of data you integrated and the nature of your inquiries. For instance, if you primarily focus on factual queries, a model trained on factual language understanding might be ideal.
- Embrace the power of precision: Remember that formulating specific and well-defined questions is crucial for extracting the most accurate and insightful responses from the chosen AI model.
How to add YouTube in Chat with RTX?
Ever wished you could seamlessly weave the vast knowledge and entertainment potential of YouTube into your conversations with Chat with RTX? Well, wish granted! This guide empowers you to effortlessly integrate YouTube videos and their transcripts, enriching your interactions with the AI companion.
Integrate YouTube with Chat with RTX
- Begin by launching Chat with RTX and navigating to the “Dataset” section within the interface. This section typically houses options related to managing your data sources.
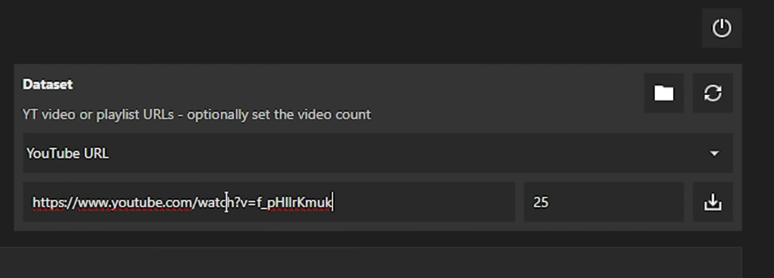
- Look for a dropdown menu within the “Dataset” section, often represented by an arrow icon. This menu grants you access to various data source options.
- Select the “YouTube” option from the aforementioned dropdown menu. This initiates the process of integrating YouTube content into your Chat with RTX experience.
Transcription of the video
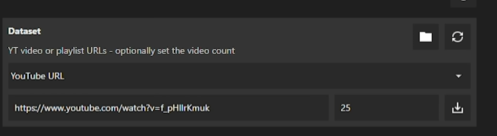
- Copy the link to the desired YouTube video or playlist you wish to integrate. Ensure the link accurately reflects the specific content you intend to utilize.
- Within the designated section, specify the maximum number of transcripts you wish to download from the chosen video or playlist. This allows you to manage the amount of data you integrate and tailor it to your specific needs.
- Once you’ve provided the link and defined the number of transcripts, commence the download process. Be patient as Chat with RTX retrieves the relevant transcripts from the vast YouTube library.
Starting conversation about the video
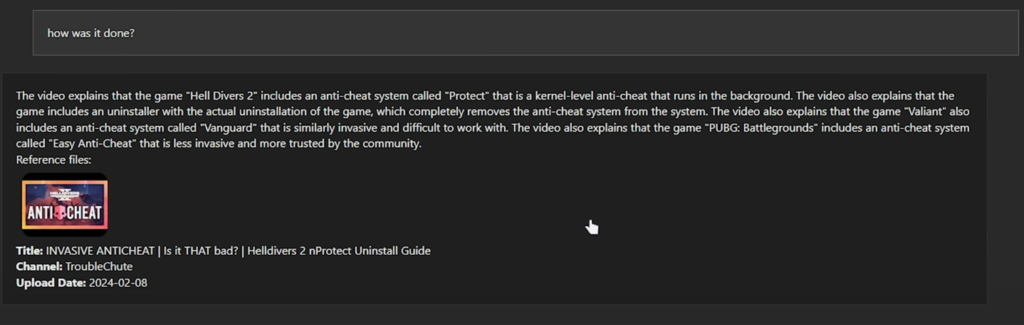
- Upon successful transcript download, initiate a model refresh within Chat with RTX. This critical step ensures that the newly acquired transcripts are recognized and incorporated into the platform’s AI model.
- Now comes the exciting part! Craft your questions and engage in insightful conversations with Chat with RTX. Leverage the retrieved transcripts to pose specific inquiries about the videos, request video summaries, or even spark discussions based on the gleaned information.
By following these steps and embracing the power of YouTube integration, you can unlock a new dimension of interaction with Chat with RTX. From delving deeper into specific topics to fostering engaging conversations, the possibilities are boundless!
What are the benefits of Chat with RTX? Is it any good?
- Offline AI Interaction: Engage with sophisticated AI models sans internet dependency, ensuring uninterrupted access and privacy preservation, even in remote locales.
- Personalized Chatbot Creation: Harness the power of your data sets to train and personalize Chat with RTX, customizing responses to align with your unique requirements.
- Enhanced Privacy: Retain absolute control over your data, stored locally on your device, mitigating concerns regarding cloud-based storage vulnerabilities.
- Expeditious Response Times: Leverage the processing prowess of Nvidia RTX GPUs to facilitate swift response generation, minimizing conversational lags.
- Versatile Applications: Explore an array of use cases beyond casual conversation, spanning research assistance, data extraction, and creative writing prompts.
- Continuous Evolution: Foster a personalized and evolving conversational experience by continually enhancing Chat with RTX’s capabilities through the integration of new data sets and exploration of diverse AI models.
- Offline Task Accessibility: Seamlessly execute online tasks in offline scenarios, such as summarizing research papers or generating creative content sans online distractions.
- Potential Cost Savings: Bid adieu to subscription fees associated with cloud-based AI services, potentially yielding long-term cost efficiencies.
In essence, Chat with RTX epitomizes a symbiotic fusion of offline functionality, data privacy, personalization, and computational potency, presenting users with an unparalleled AI chatbot experience. Embrace this guide as your compass, navigating the realm of Chat with RTX with finesse and efficacy.


Pingback: How To Activate Windows 11 for Free Using CMD - ZuiAndroid